

ChatGPT has revolutionized the way people interact with technology. It has brought about a new era of personalized and natural language communication, making it easier for individuals to access information, get things done, and connect with others. From customer service chatbots to language learning apps, ChatGPT has enabled more seamless and efficient communication, creating a more convenient and connected world for people everywhere.
We do have a great interface for ChatGPT, but for people from tech who love CLI more than the GUI , there are some short and sweet methods to get this running. Yes, you are right. Developers and community around have made some packages and stuff so that we can get it loaded to CLI in minutes.
So Lets get started.
Pre-requisites
You would require a linux machine or an Virtual Instance.
Incase you do not have any, please signup with some cloud provider like AWS, GCP or any other of your choice and get it up and running.
You would require Python and the Python PIP to start with the process.
Python is an indispensable tool, and ShellGPT (the command line version of ChatGPT) is built on Python, as are many other Linux tools and libraries.
In fact, ChatGPT is built in Python as well as other languages.
Python is typically preinstalled on the most recent Linux distributions.
So, first, use the following command to determine the Python version installed on your Linux PC:
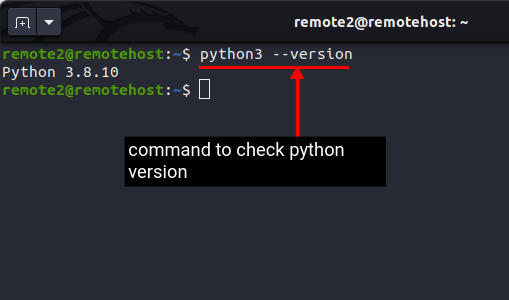
Incase you are not able to find python3 (usually it is installed by default with most systems when got it from cloud providers), then install python3 with the command
sudo apt install python3 -y
Install Pip Package Manager
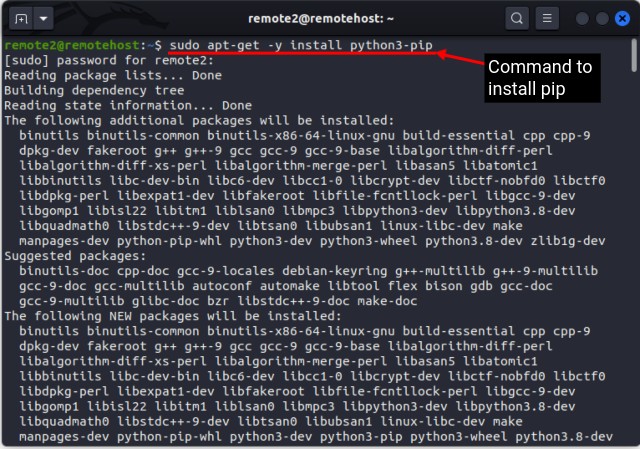
Pip is a Python package manager that works across platforms. It aids in the management of the various Python packages and libraries required to bring ChatGPT to Linux. With a single command, you can install, upgrade, and uninstall the required packages. It generally comes preinstalled with Python in most Linux distributions, but if it is not installed, you can install it with this command:
sudo apt install python3-pip -y
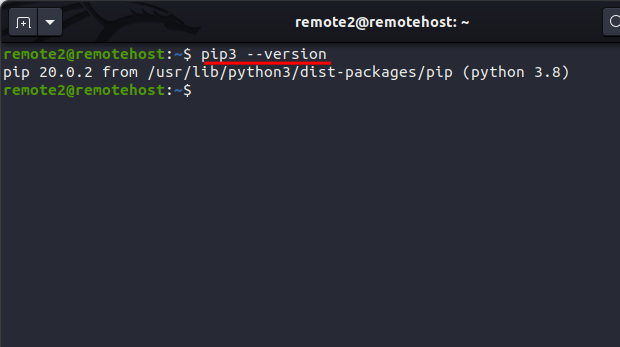
Once installed you can check the Pip version installed in Linux with the following command: pip --version
Install Venv Module
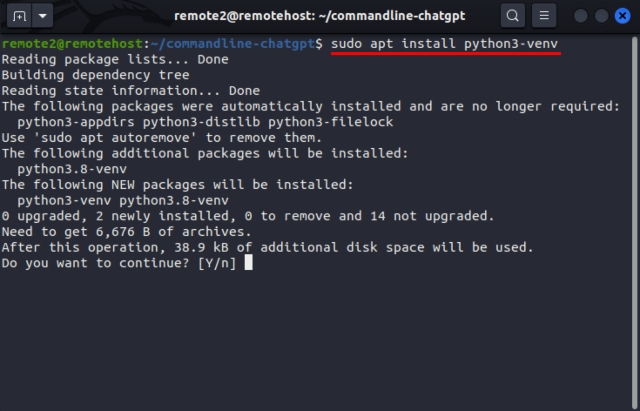
This module is not required for ShellGPT or ChatGPT, but it is recommended that you install it in order to create an isolated virtual environment in Linux and avoid conflicts with other libraries. When you install a library or package, many background dependencies are installed, which can interfere with other libraries. To create a virtual environment for a project, you need the “venv” module, which can be installed using the command below:
sudo apt install python3-venv
Now this venv is used to create virtual enviroment in the system.
Let us create a folder and then use that folder as a path to venv
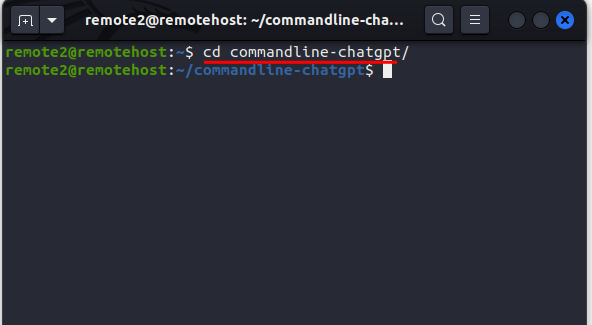
mkdir commandline-chatgpt
cd commandline-chatgpt
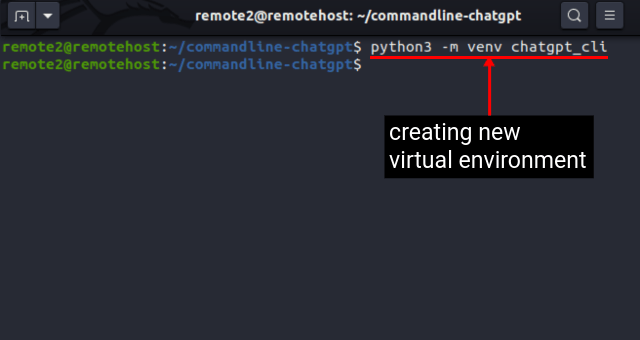
Now, use the command below to create a virtual environment with the venv module. We have used the “chatgpt_cli” name for our virtual environment.
python3 -m venv <virtual_environment_name>
For example: python3 -m venv chatgpt_cli
5. The virtual environment you just created will be deactivated by default. To activate the environment, use this command:
source <virtual_environment_name>/bin/activate
Once you execute the above command, the shell prompt will now display the name of the virtual environment in brackets, like this:
(<virtual_environment_name>)<username>@<system_name>
As you can see in the image below, the default Linux shell prompt changed to (chatgpt_cli) remote2@remotehost upon running the commands above.

Get Your OpenAI API Key
In order to use ChatGPT’s services in Linux, you will need an OpenAI API key. Currently, OpenAI is offering $5 credits for trial use. Once you exhaust the credits, you need to pay for access to the API. That said, here’s how you can get an OpenAI API key for this command line ChatGPT chatbot:
1. Navigate to OpenAI’s website (visit) and create a new OpenAI account. If you already have an account, simply log in and move to the next step.
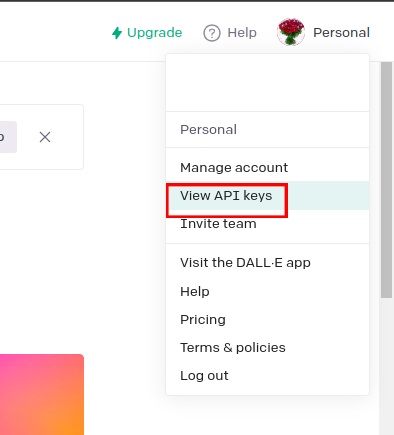
2. Next, click on your profile image at the top right corner and select “View API keys” from the drop-down menu.
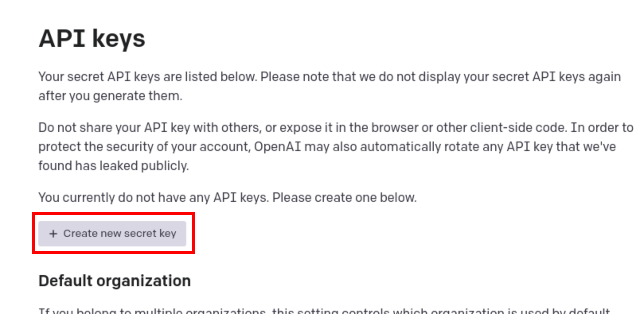
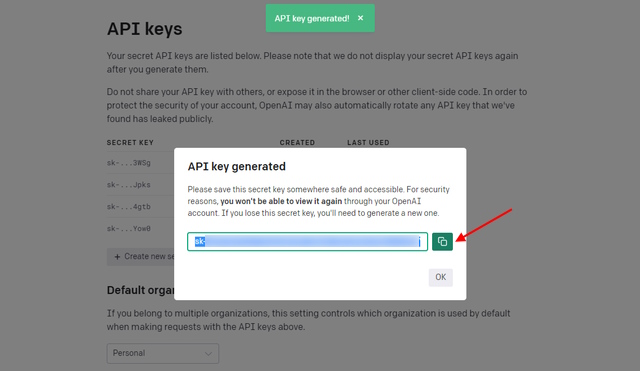
3. Here, you will see all the previously generated API Keys if any. To generate a new API key, click the “Create new secret key” button.
4. A new pop-up box will open with your API key. Do not share this API key with anyone or share it publicly. Copy your API key in a secure file or location, as you can only view it once. You won’t be able to copy the API key after you click “OK” here.
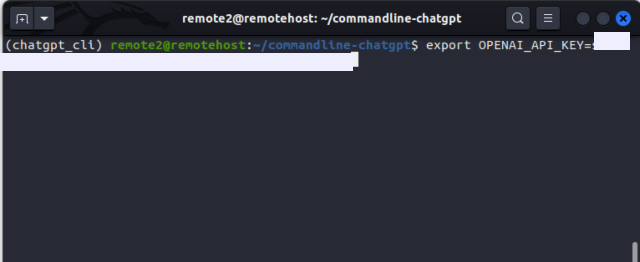
5. Now, create an environment variable for this API key with the command below. In Linux, you can create an environment variable using the “export” command. Replace <your_OpenAI_API_key_here> placeholder with the actual API key you generated to use ChatGPT in the Linux terminal.
export OPENAI_API_KEY=<your_OpenAI_API_key_here>
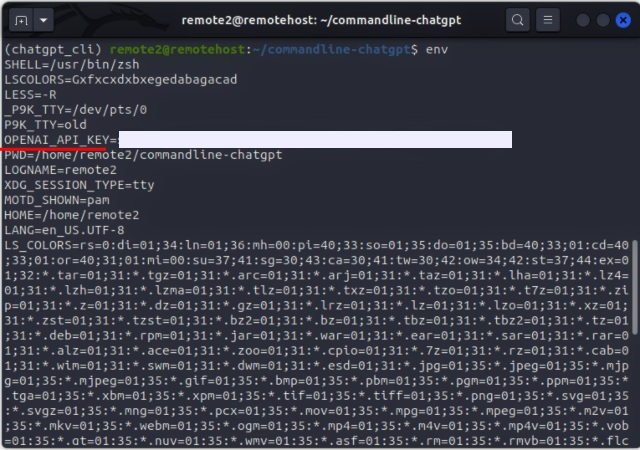
6. Verify the environment variable by listing it with the env command:
env

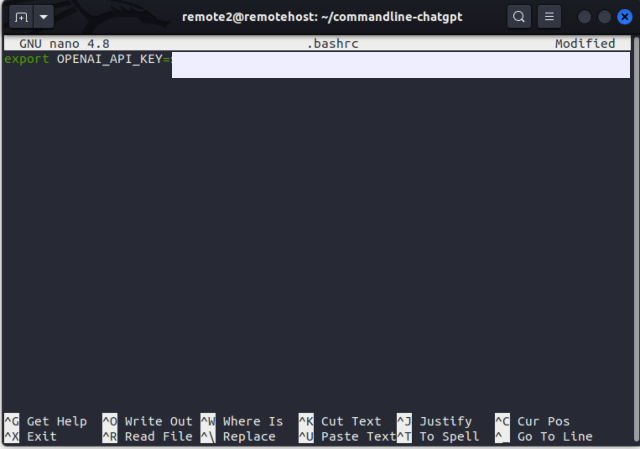
7. This variable is only temporarily stored for the current session. To store the API key permanently, open the .bashrc file in the text editor of your choice and add the variable at the end of the file.
export OPENAI_API_KEY=<your_OpenAI_API_key_here>
8. Save the file and exit the text editor after you have added the OpenAI API key. Now, run this command for the changes to take effect:
source .bashrc
9. Finally, verify the changes with the env command:
env
Install ShellGPT to Use ChatGPT
Having finished setting up the environment, you can now proceed to install the command line version of ChatGPT in Linux. You need to omit the –user flag if you are installing it in a virtual environment. Now, use the command below to install ShellGPT on your PC:
pip3 install shell-gpt --user

ShellGPT: Syntax & Options
Now that you have installed ShellGPT, you must be eager to use it for various tasks. But before that, let’s check out the syntax and some options that we can use to make our outputs interesting. Using ShellGPT for multiple tasks is easy, thanks to its straightforward syntax:
sgpt <options> <input_query>
Some of the options you can use with the ShellGPT (sgpt) chatbot are:
| Option | Description |
--temperature | Changes the randomness of the output |
--top-probablity | Limits to only the highest probable tokens or words |
--chat | Used to have a conversation with a unique name |
--shell | Used to get shell commands as output |
--execute | Executes the commands received as output from --shell option |
--code | Used to get code as output |
How to Use ChatGPT in Linux Terminal (Examples)
1. Use ShellGPT for Queries
You can use ShellGPT as a search engine for any sort of query. Since it is an AI chatbot, you get results with more human-like answers and not a series of ranked web pages like most search engines. The syntax to use ShellGPT to get answers to your questions is:
sgpt "<your_query>"
For example, if you need to know the mass of the sun, use this command:
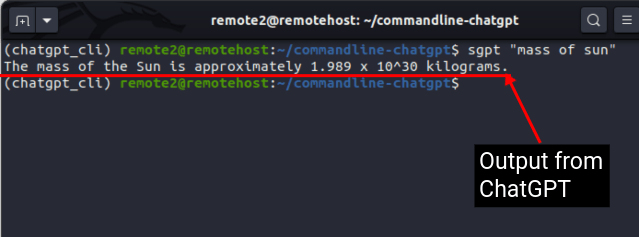
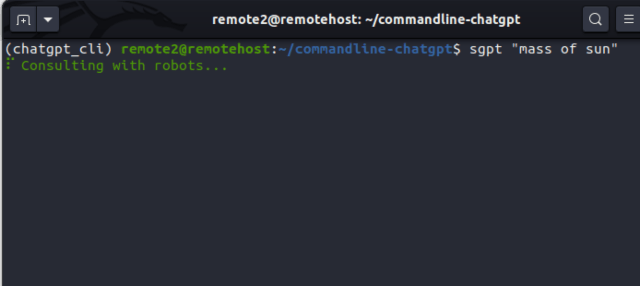
sgpt "mass of sun"
You see a nice animation in the Terminal while ShellGPT tries to get a response. The response we received is highlighted underneath. You might get a similar reply depending on how the model is trained:
The mass of the Sun is approximately 1.989 x 10^30 kilograms.
How to Set up and Use ChatGPT in Linux Terminal
2. ChatGPT Chatbot Mode
If you had used ChatGPT for chatting, you must have felt that it is responses are no less than a human. Now with the help of ShellGPT, you can even use ChatGPT right from your Linux terminal. Simply use the --chat option followed by a unique session name and a prompt.
sgpt --chat <unique_chat_session_name> <input_prompt>
For instance, if you want to ask ChatGPT to tell you a joke, use this command:
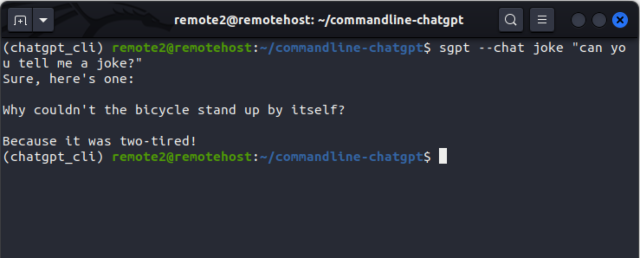
sgpt --chat joke "can you tell me a joke?"
Once you run the above command, you will get the following result as output:
Sure, here's one:

Why couldn't the bicycle stand up by itself?

Because it was two-tired!
3. Generate Code
You can even use the CLI-based ChatGPT tool to solve coding problems or generate code snippets. Simply use the --code flag to generate code for your prompt, as shown here:
sgpt --code "<input_prompt>"
For example, if you want to solve the classic Fizz Buzz problem using python, use this prompt:
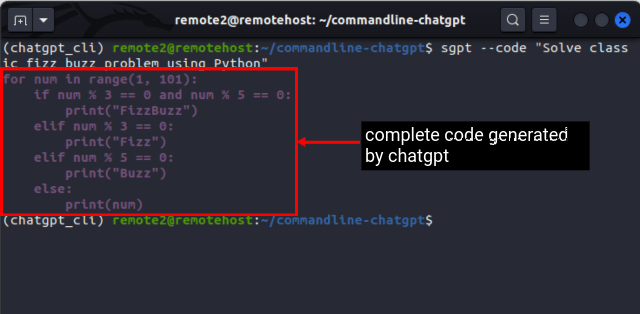
sgpt --code "Solve classic fizz buzz problem using Python"
ChatGPT will quickly give you an output, which you can then paste into your code editor and test it out:
for i in range(1, 101):
    if i % 3 == 0 and i % 5 == 0:
        print("FizzBuzz")
    elif i % 3 == 0:
        print("Fizz")
    elif i % 5 == 0:
        print("Buzz")
    else:
        print(i)
4. Generate Shell Commands
While the Terminal can be a powerful tool to execute complex commands and automate tasks, it can sometimes be difficult for novice users to remember the syntax and options of various Linux commands. With ChatGPT in your command line, you can not only get the syntax of a Linux command but also get the exact command with the parameters and options required. Simply use the --shell flag as:
sgpt --shell "<input_prompt>"
For example, if you need to set the read-only permission for all files in the current directory, use the command:
sgpt --shell "Make all files in the current directory read-only"
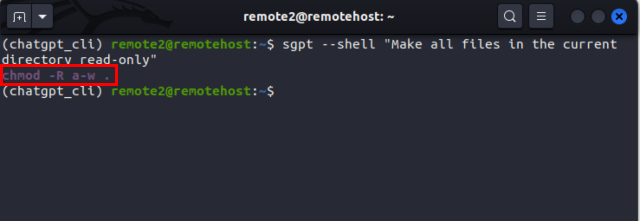
As expected, ChatGPT delivers and returns this as the output:
chmod -R a-w .
Furthermore, if you use the --execute and the --shell flag together, you can even execute the shell command generated directly. As for the above example, here’s what the syntax looks like:
sgpt --shell --execute "make all files in current directory read-only"
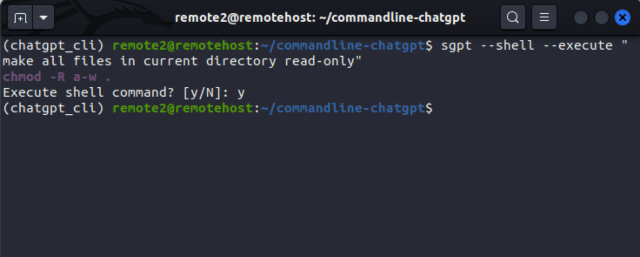
You will get the following output:
chmod -R a-w .
Execute shell command? [y/N]: y
So, ShellGPT integrates the power of ChatGPT into your Linux terminal.
It not only simplifies command-line work for both novice and experienced users, but it also adds new features.
And, as previously stated, because it is designed to learn from users, it becomes more useful over time.
However, remember not to share any sensitive information or data with any AI model, especially proprietary code from your company.
That said, do let us know what you think of this AI command line tool in the comments below.